
About the Author:
Jeff Nunn is the founder of Project Biohacking. With over 30 years of biohacking practice, he applies decades of self-experimentation methodology to peptide research, dosing math, and vendor evaluation.
Educational only, not medical advice. Always follow your licensed clinician’s instructions for dose, route (SubQ vs IM), timing, storage, and technique.
Injecting peptides(sometimes called taking a peptide shot) can be part of a provider-guided wellness plan, but the benefits only matter if your process is clean, consistent, and accurate. Most injection issues come from rushing, sloppy technique, or "winging it" based on what's trending online.
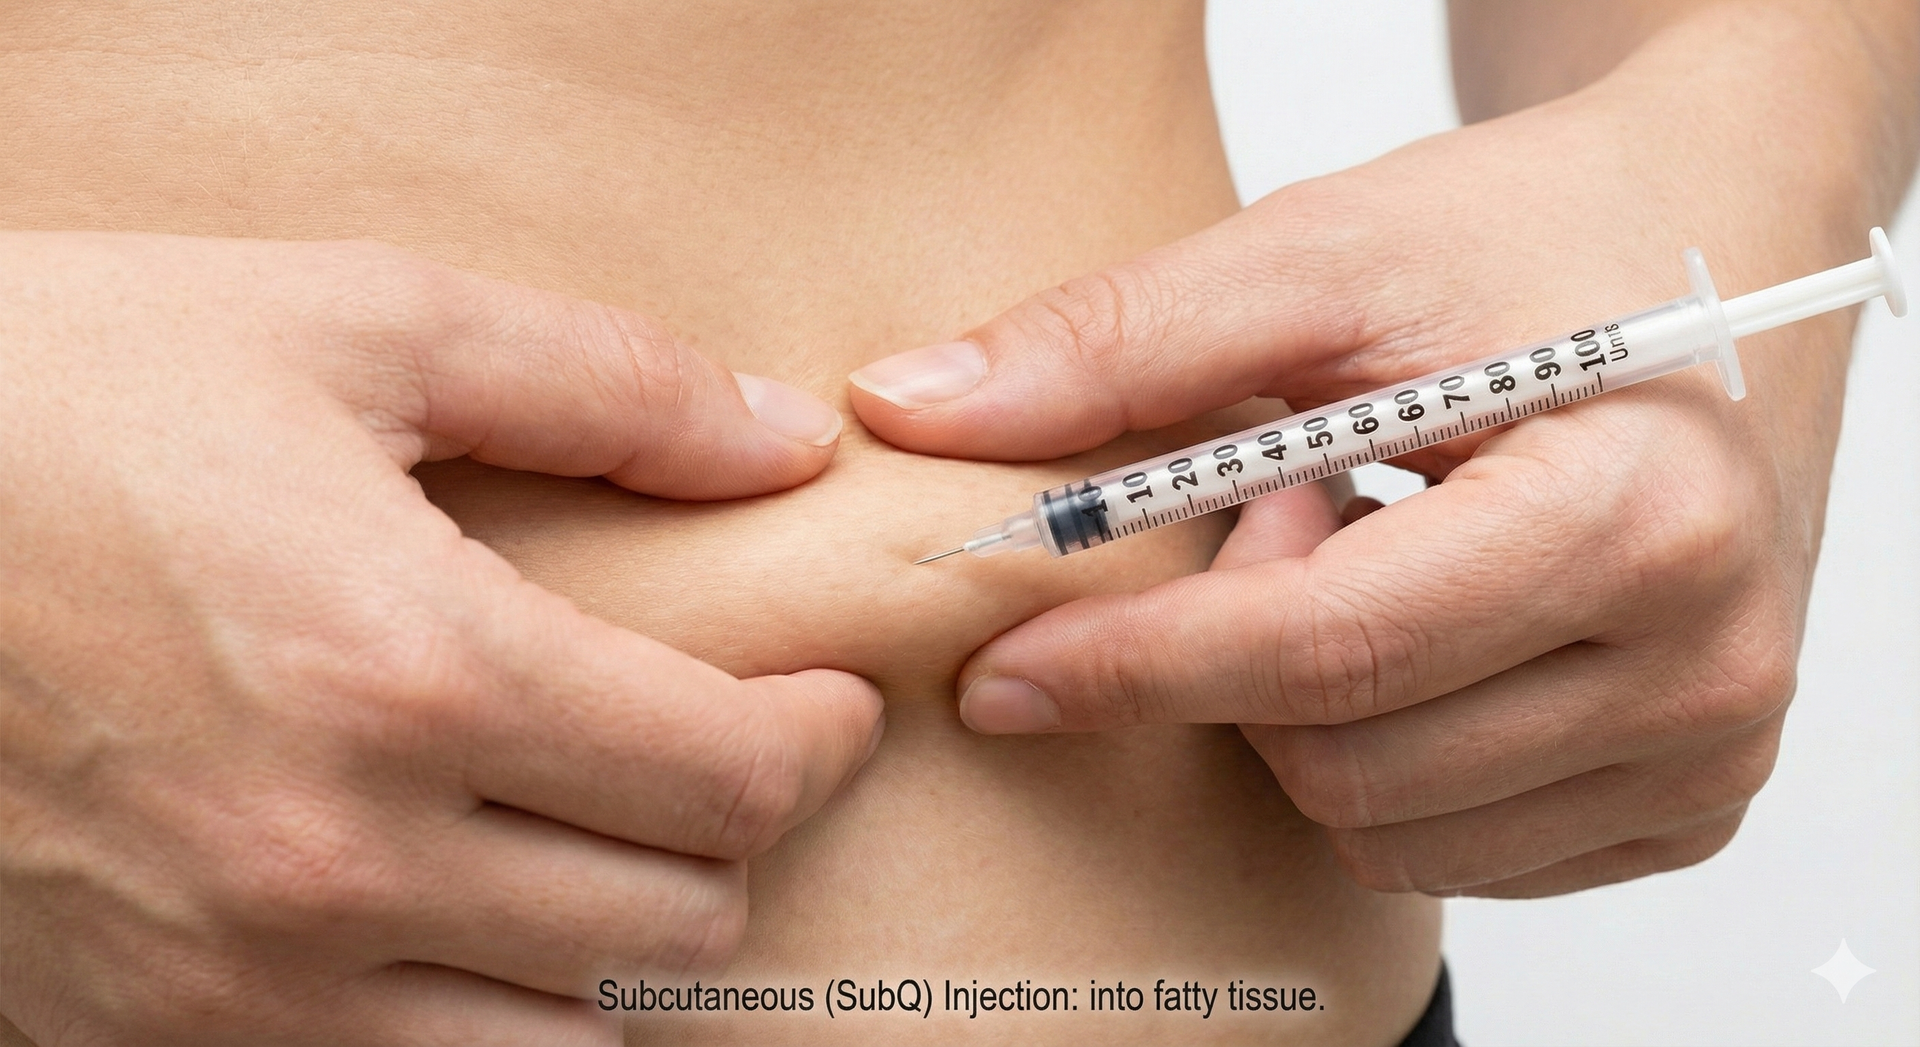
This guide covers how to inject peptides safely at home: subcutaneous technique, where to inject, how to prepare your dose, and the aftercare that keeps you out of trouble. Project Biohacking is built around a simple idea: turn complicated science into clear action without hype. If you've been prescribed an injectable peptide and your clinician has trained you to self-administer, the fundamentals below walk you through it step by step.
Most at-home peptide injections are subcutaneous (SubQ), meaning the peptide is injected into the fatty layer just under the skin. SubQ is common because it's typically easier to learn, uses smaller needles, and is generally well tolerated once you're trained.
Less commonly, a provider may direct intramuscular (IM) injections (into muscle). IM requires different needle selection and technique. If your prescription says IM and you haven't been trained hands-on, stop and ask your provider for guidance.
If you want a deeper overview of what peptide therapy is (and why delivery method matters), start here: our complete guide to peptide therapy.
Get urgent medical help if you experience trouble breathing, swelling of face, lips, tongue, or throat, widespread hives, or symptoms of a severe allergic reaction. Also seek care for rapidly worsening redness, heat, swelling, pus or drainage, or fever (possible infection).
Most SubQ peptide injections require the following:
If your peptide is a powder that requires mixing (reconstitution): do that only if you've been instructed and trained. For step-by-step reconstitution basics, see: Peptide Reconstitution Guide. If you're learning what bacteriostatic water is and why it's used, read: Bacteriostatic Water for Peptides.
Starting from scratch? Source quality peptides first.
Clean technique only matters if the product in the vial is legitimate. Before you inject, check where the peptide came from. We hold a verified code with eight research peptide companies and re-check every code monthly against the live vendor site.
Why it matters: Most injection errors happen before the needle touches skin: rushing, contamination, or forgetting supplies mid-process.
Confirm:
If anything doesn't match what you were prescribed, stop and contact your pharmacy or provider.
Common SubQ injection sites include:
Rotate sites to reduce irritation, bruising, and the chance of developing tender lumps over time. Avoid injecting into bruised, scarred, hard or lumpy, red, or inflamed areas.
Note on knee injections: If a therapy involves injection into a joint (intra-articular), that's typically clinician-performed. At home, most people should stick to SubQ sites unless specifically directed and trained by a medical professional.
If you have a prefilled syringe: keep the needle sterile and remove the cap only when ready to inject.
If you're drawing from a vial (only if instructed):
If you need help converting vial strength and water volume into a draw amount per dose, use the peptide calculator to eliminate guesswork.
If you want to understand exactly how concentration is determined by your water volume choice, read the peptide concentration 101 guide before your first injection.
Keeping your reconstituted peptide stable between injections is equally important. Our peptide storage guide covers refrigeration, shelf life, and freeze-thaw best practices.
If you're calculating an animal-specific dose based on body weight and concentration, use the peptide calculator for pets to determine the exact volume before measuring with a syringe.
What it should feel like: usually a quick pinch or mild sting. If you consistently feel sharp pain, burning, or bad injections, ask your provider to review your technique and site selection.
Place the used syringe and needle straight into a sharps container. Do not reuse needles or syringes ever. Keep disposal simple: inject, drop, done.
Biohacking works best when you track what you're doing. A simple log helps you catch patterns early:
If you want a clinician-style walkthrough on reconstitution, dosing math, and injection basics without guesswork, explore:
For guides, calculators, and educational resources, browse the Project Biohacking Digital Library and subscribe to the Project Biohacking Newsletter.
Ready to start? Before you order, check the current peptide discount codes for every company we track.
Most SubQ injections feel like a quick pinch. If it consistently hurts, it is usually technique, speed, site choice, or injecting into irritated tissue.
For SubQ, common sites are the abdomen (away from the belly button), outer thigh, and upper arm. Rotate sites to reduce irritation.
Your prescription or clinic instructions should say. If it is unclear, do not guess, ask your provider or clinic. IM injections require different technique and needle selection.
Mild redness or tenderness is common. Watch for nausea, water retention, appetite or energy changes, and any unusual mood or sleep changes. Seek urgent help for breathing difficulty, facial or throat swelling, or severe infection signs.
No. Reuse increases contamination risk and tissue damage. Use a new sterile needle and syringe every time.
Do not double up unless your clinician specifically instructs it. Contact your provider for the correct next step.
Follow the pharmacy label exactly. Many require refrigeration, but storage varies by product. Improper storage can reduce potency.
Important Disclaimer
The information provided on this page and throughout Project Biohacking is for educational and informational purposes only. It is not intended as medical advice, diagnosis, or treatment, and does not replace consultation with a qualified healthcare provider.
Peptide use, reconstitution, dosing, and injection techniques carry risks. All content assumes you have been properly trained and prescribed by a licensed clinician. Individual results vary. Never self-administer peptides without professional medical supervision.
Project Biohacking and its authors assume no responsibility or liability for any injury, loss, or damage resulting from the use or misuse of information on this site. Always follow your clinician’s instructions, verify all calculations independently, and seek immediate medical attention for any adverse reactions.
Statements regarding peptides have not been evaluated by the FDA. This site does not sell or dispense peptides and makes no claims about efficacy, safety, or therapeutic use.

About the Author:
Jeff Nunn is the founder of Project Biohacking. With over 30 years of biohacking practice, he applies decades of self-experimentation methodology to peptide research, dosing math, and vendor evaluation.
Important Disclaimer: The content on Project Biohacking is for educational and informational purposes only and is not intended as medical advice, diagnosis, or treatment. Always consult a qualified healthcare professional before making any changes to your health regimen, starting new supplements, peptides, or protocols. Nothing on this site establishes a doctor–patient relationship, and you use the information at your own risk. Research compounds discussed here are sold for laboratory research purposes only and are not approved for human or veterinary use or consumption.
“For educational use only. Not medical advice. Read our full disclaimer.”
+1 214-278-4039
All Rights Reserved | Project Biohacking